

I once saw a paper pendant tutorial by Patricia Zapata and I thought the idea of wearing my papercut would be awesome! Anyway I haven't been shopping for new pendants in a long time, it'd be nice to be able to add new ones according to my desire. Since I don't own any cutting machine I have to make sure that my choice of design should be geometric and simple enough because there's gonna be layers of paper to cut so deep. I chose a Tardis!
Here's how I did it (which is basically just like what I learnt from Patricia Zapata).
Items needed:
160gsm/thicker papers, x-acto knife, spray mount or glue, blue spray paint, chain necklace

Step 1. Get your Tardis template here. You can set your own preferred size. I made mine in 1 6cm x 10 cm. Print the template out in a 160 gsm paper and get +/- 10 layers of paper to stack below the Tardis template. The idea is to get all of these layers glued together. I did mine using spray mount because I thought it'd be easier than to use glue. Just make sure that you spray generous amount (I initially had 12 layers, 3 fell off). Or if you wanna play safe, get the good old glue. Apply evenly all around the surface of the paper so there won't be any bump.
----

Step 2. When the glue has dried and the papers look like they're holding in well, start cutting along the lines of the template using x-acto knife. Cutting 10 layers of paper is not easy, I warn you. Patience is a must. Start very lightly and slowly and make sure that the first layer is correctly done. I suggest you go slow and keep a light stroke instead of adding pressure. The tricky bit would be where the corners meet. Just cut slowly and you'll get it.
----
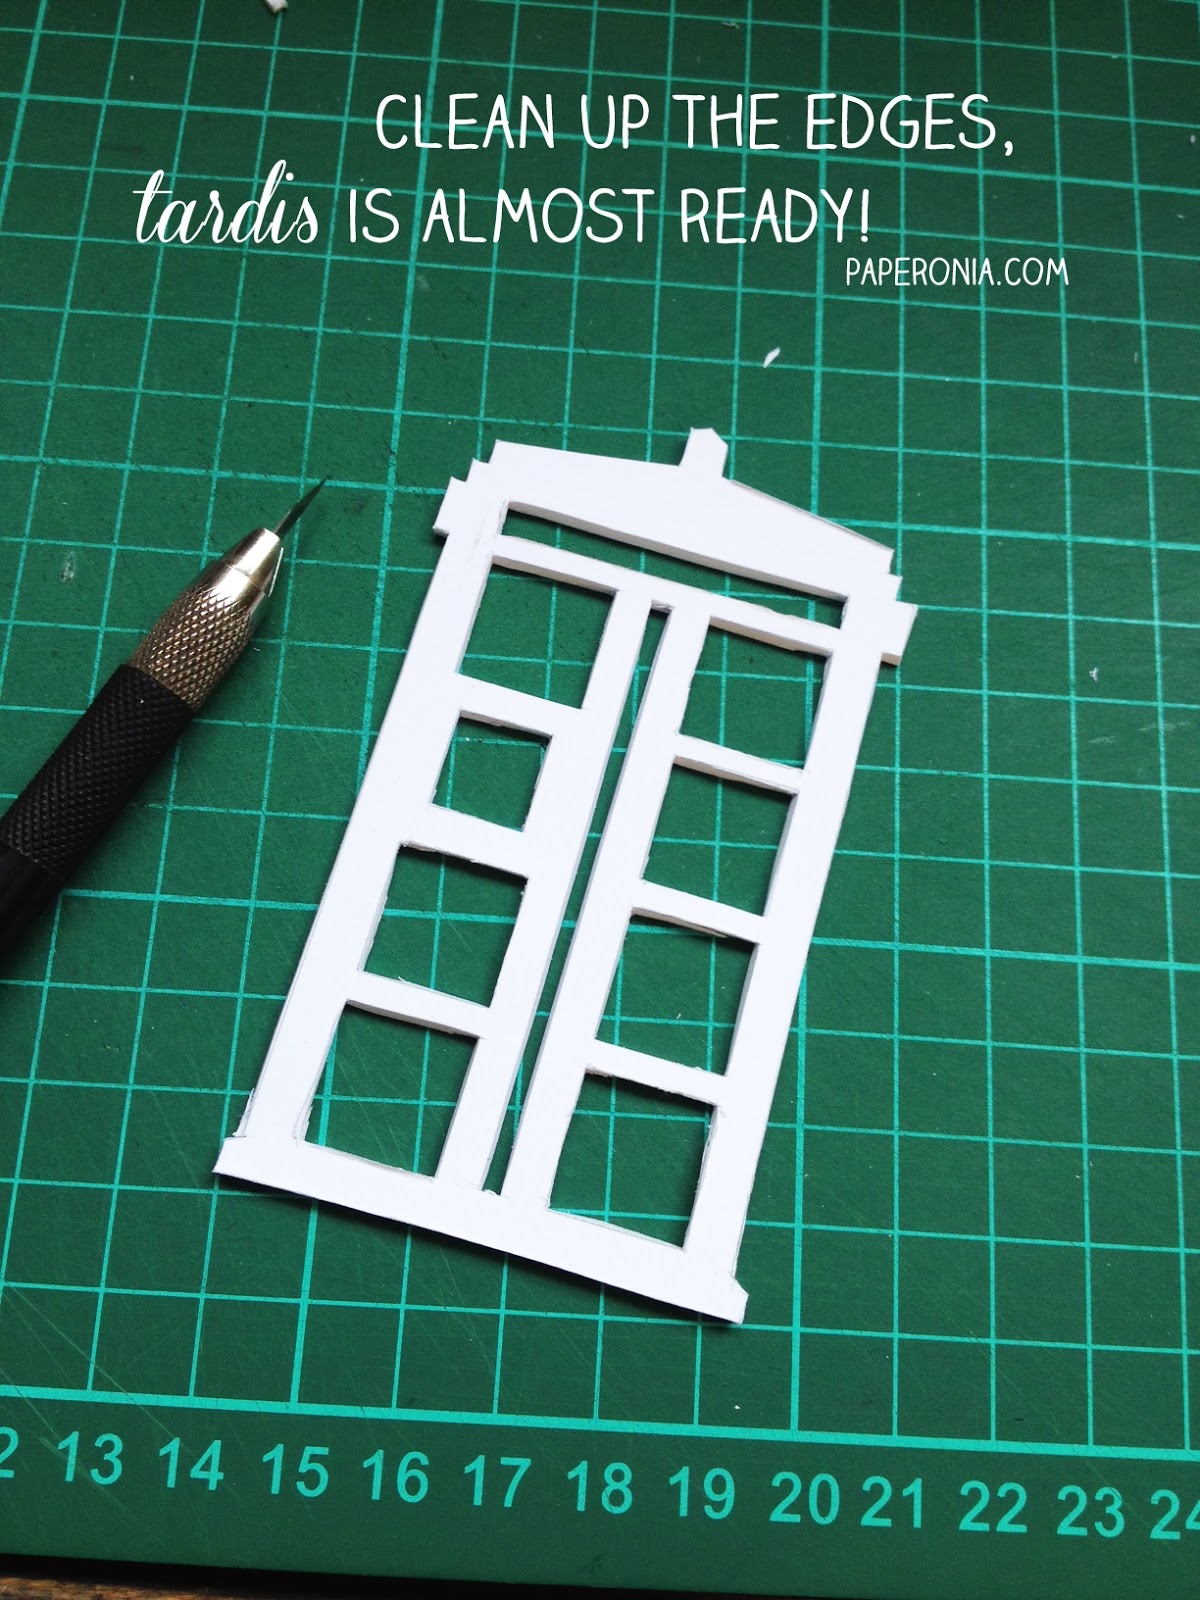
Step 3. When you finish cutting the whole thing, celebrate! Get a drink and take a break! When you're ready to proceed, clean up hairy bits of the edges (I had lots in mine) and make desired adjustments before getting to the final step.
----

Step 4. Almost done! Now you can start spray-painting your paper Tardis in blue. Spray lightly and do multiple layers to get even coat. If you wish, you can also add bits of details with acrylic paint. For the final touch, I added 2 layers of clear spray paint to give a little bit of glossy look. When it's dried, get your chain/necklace and loop it around your Tardis and voila, paper Tardis pendant you made from scratch with your two hands!
By now you should get the gist, you can make any other design or shape or icon you want. In my opinion, though, anything so long as it's geometric, because the knife is so hard to maneuver in layers. But the possibilities are still endless! Go nuts!
No comments
Post a Comment