
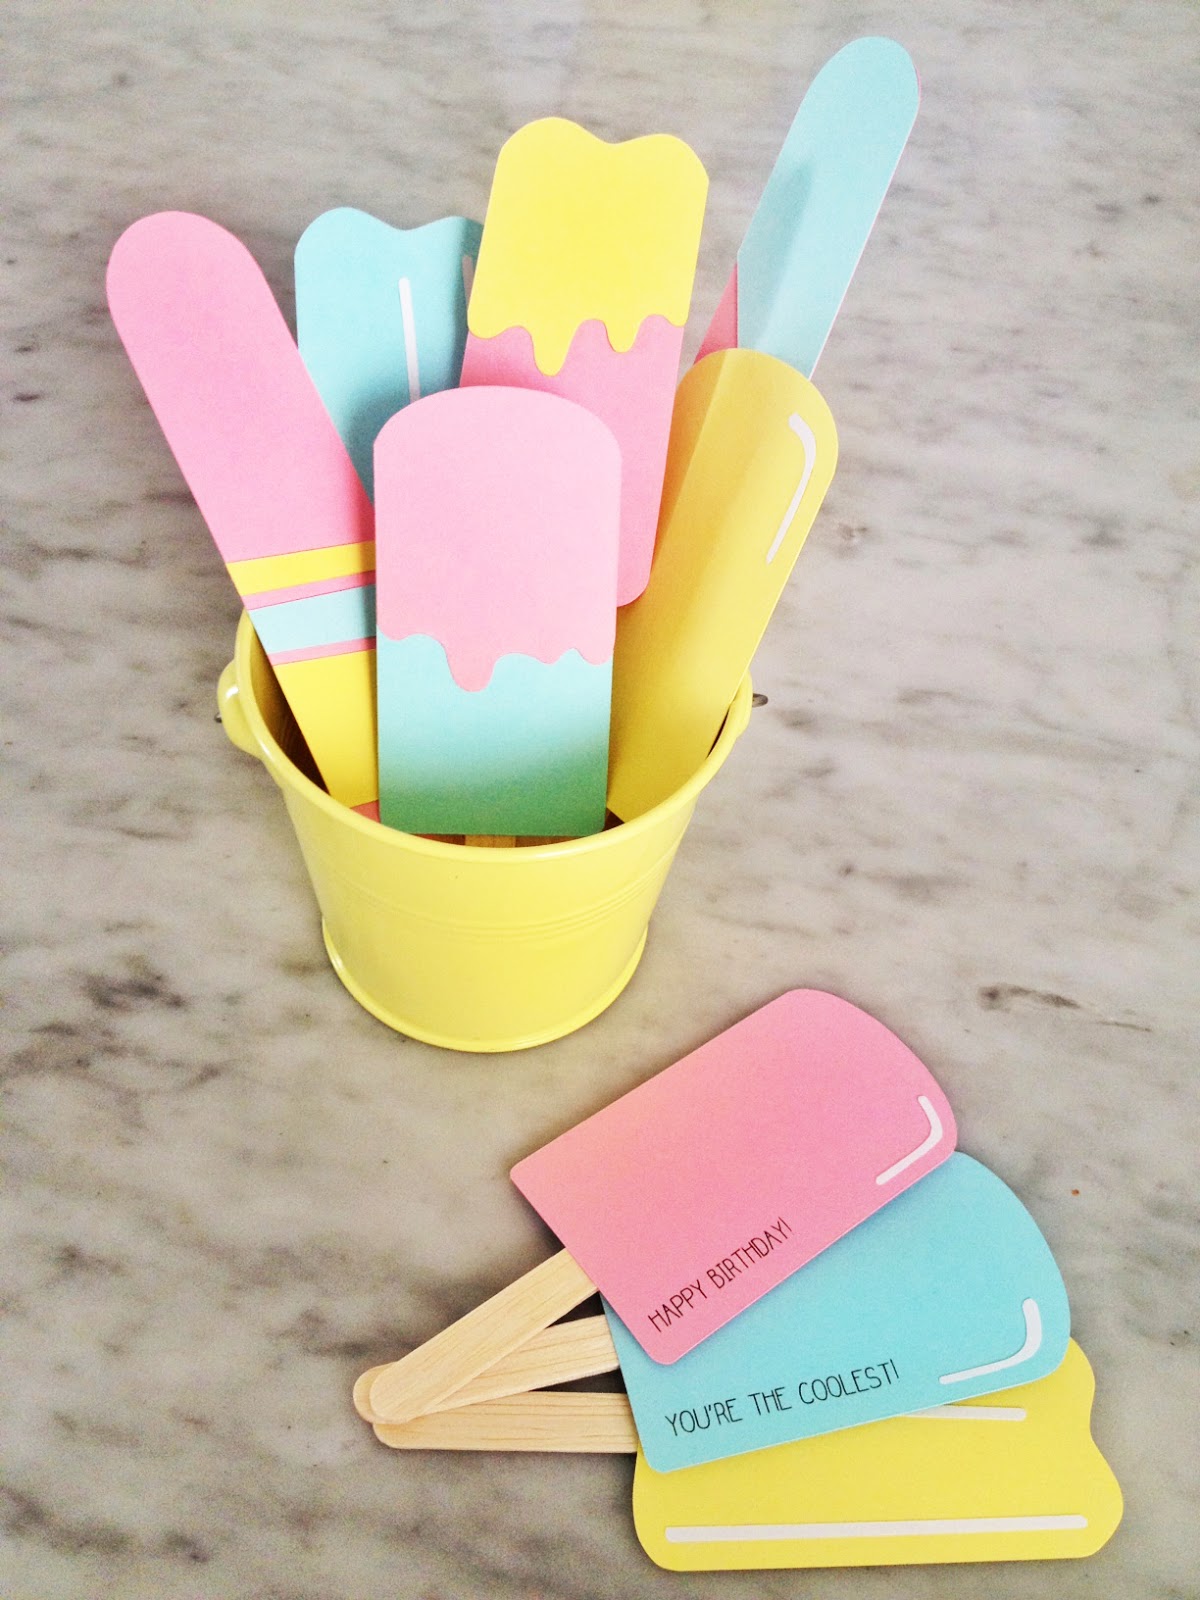
This was super fun! I made popsicles out of colored papers and they turned out really cute. They can be used as greeting cards, invitations, or bookmarks. Here's a quick guide on how to make them.
Items needed:
- thick color papers or card stocks (I used 200 gsm)
- small bits of white paper
- popsicle sticks
- glue
- pen
Direction:
1. Download the template below. Set the templates and assigned them ready for printing on chosen colors of card stocks. A popsicle is made up of 3 sections - the front, the back, and the highlight. The front and the back is exactly of the same shape only the back side is slightly smaller. I chose to use different color papers for the front and the back parts. Print the highlight on white paper.
2. Print the template out, cut accordingly
3. Glue the popsicle stick to the front part, and afterwards glue the back part - the popsicle stick should then be sandwiched between the front and the back parts.
4. Add on the highlight bits on to the popsicle.
5. Write your wishes or message using a pen
6. You can 'freestyle' the popsicles by adding on left over cut outs and have more colors in one piece. Cut out shapes to give "melting" or "dip syrup" effect

Click to see full size image and save this template.


The back part is slightly smaller and looks good in different color. Write your message here.

You can add on another (or more) layers of shapes to add more fun popsicle effects using left over papers.
Have fun!
No comments
Post a Comment